You have no items in your shopping cart.
How to Make an Archery Target

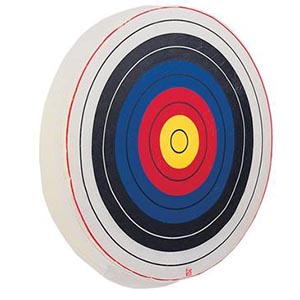
Archery targets are needed for any archer enthusiast, but often have a limited use before it starts to break under the pressure of repeated hits with the arrow. For those looking to reduce costs, creating archery targets can be a cost effective way to maintain targets, without having to purchase new ones frequently.
Paper fibre is an inexpensive way to recycle paper products into a durable and low-cost archery target. The finished result is strong enough to stop arrows and hold in place for multiple uses.
To create an archery target you will need:
- A fibreglass mould: Ensure the fibreglass is the same size you would like the archery target to be. This will be used as a moulding for the actual target.
- Archery foam: High density 2-part expanding polyurethane foam
- Release Agent: To prevent mixture sticking to the mould
- PU Pigments: Use to pigment the foam however foam can be painted once demoulded
Additional: For smaller moulds we suggest using release agents Ease Release 200 or for larger moulds Meguires Paste Wax.
1. It is essential to follow the mixing procedure carefully
Accurately weigh each component and pour into the same clean, dry container. To produce good quality foam mix the products with an electric drill or paint mixer for 10 second at 200rpm.
2. Apply the release agent to the mould prior to pouring the mixture
We recommend a wax based release. Ensure release is reapplied before each moulding.
3. Pour the mixture into mould before cream time is reached
Ensure the mixture is applied liberally and evenly.
4. Make small venting holes
As foam generates pressure within the mould incorporate small venting holes in the mould to control ventilation. To prevent voids below the surface of the foam skin- do not excessively create venting holes and ensure holes are at the highest point of the mould.
5. Allow the mixture to set properly
6. Carefully remove the target from your mould
7. Leave to target to dry for 24 hours
The target will need to continue drying after being removed from the mould, to ensure it is entirely dry before painting. (optional)


