You have no items in your shopping cart.
How to Apply Polyurethane

Available in many different options and varieties, polyurethane makes for a durable finish to many different surfaces. Acting as a sealant, polyurethane offers matte, semi-gloss or gloss finishes, allowing the user a customized experience for virtually every project they desire.
One of the more popular uses includes finishing wood furniture and accessories. For many looking to start using polyurethane products for at-home projects, it might not work as easily as planned. Facing matte finishes, air bubbles and a “sticky” appearance are just some of the common issues many face when attempting to use polyurethane for the first time.
By following these easy steps, you’ll avoid these common pitfalls commonly seen when first using polyurethane products.
Materials Needed For Fibreglass Application:
- Item for finishing: Ensure the item is clean, dry and free of dust and lint.
- Drop Cloth and Spare Towel: Drop cloths will help protect your work surface from any polyurethane spills or drips. When set polyurethane is incredibly difficult to remove.
- Fine-grit Sandpaper: using fine sandpaper ensures all debris, finish or dust is removed. Having a sanded surface also improves the polyurethane’s adhesion.
- Polyurethane
- Paintbrush and Stir Stick
How to use Fibreglass:
1. Prepare the Item for the Polyurethane Application. Ensure the piece is free and clear of dust and debris by sanding the entire item and then wiping it down with a damp cloth. Allow the entire surface area to dry completely before starting.
2. Prepare the Area for Your Item. Invest in a high-quality drop cloth to protect your work area and ensure that the piece is secured on top of the drop cloth. Polyurethane is difficult to remove when it is set, it’s important to have cloths and wipes available for any spills that might occur while painting.
3. Stir the Polyurethane with a Clean Wooden Paint Stick. Regardless of the type of polyurethane, it’s important to always mix the polyurethane before applying it to the item, to ensure a smooth, clean coat. Many times, the can has a chance to settle and separate – causing the gloss to rise and the adhesive to settle. This can create an uneven finish within the application. Do not vigorously mix it, as this can introduce air bubbles into the product and leave a marred finish.
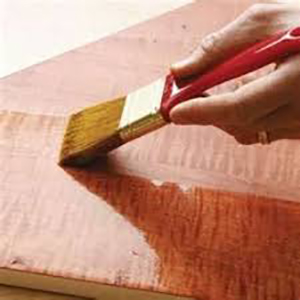
4. Using a stiff brush, apply a thin layer of polyurethane to the product. Be sure to brush along with the grain. As the polyurethane begins to dry, avoid reapplying the mixture over the same area.
5. Allow the first coat to dry. Unlike other products, polyurethane dries fairly slowly. It is recommended to wait 24-36 hours before applying the next coat.
6. Gently sand the first coat with light grit sandpaper. Ensure you remove any layers of dust by wiping the entire piece with a cloth before continuing with the second coat of polyurethane.
7. Apply second coat of polyurethane to the entire piece. If more than two coats are needed to be applied, do not sand


